Introduction
HEIC stands for High Efficiency Image Format. It’s a file format commonly used by iPhones when capturing photos, especially for live photos. Most websites unfortunately only allow you to upload JPG, JPEG or PNG images. So unfortunately that means you’ll have to solve the tricky questions of “How to convert HEIC to JPG”.
In this comprehensive guide, we will explore different use cases to convert HEIC to JPG and provide three effective methods. We’ll focus specifically on online conversion options.
Here are a few Use Cases why you’d want to convert from HEIC to JPG:
- Websites don’t accept HEIC files
- Numerous websites and online platforms require images to be in JPG, PNG, SVG or GIF to be uploaded. By converting HEIC to JPG, you can upload your photos on various platforms without any issues.
- Embed HEIC in your website
- While HEIC files usually have smaller sizes compared to JPG, not all devices or software support this format. Converting HEIC to JPG allows your images to retain their small file sizes while ensuring compatibility across a wider range of devices and platforms. Think embedding your HEIC file in a WordPress site for example. You’d want all users to view your images.
- Design Tools Compatibility:
- Some image editing tools or software may lack support for HEIC files or provide limited functionality with this format. Converting HEIC to JPG enables you to unlock a broader range of editing options, filters, and effects, allowing you to enhance your photos creatively. Figma, Miro and other tools don’t yet support import HEIC files.
So let’s dig into a few methods on how to convert HEIC to JPG.
Methods to Convert HEIC to JPG:
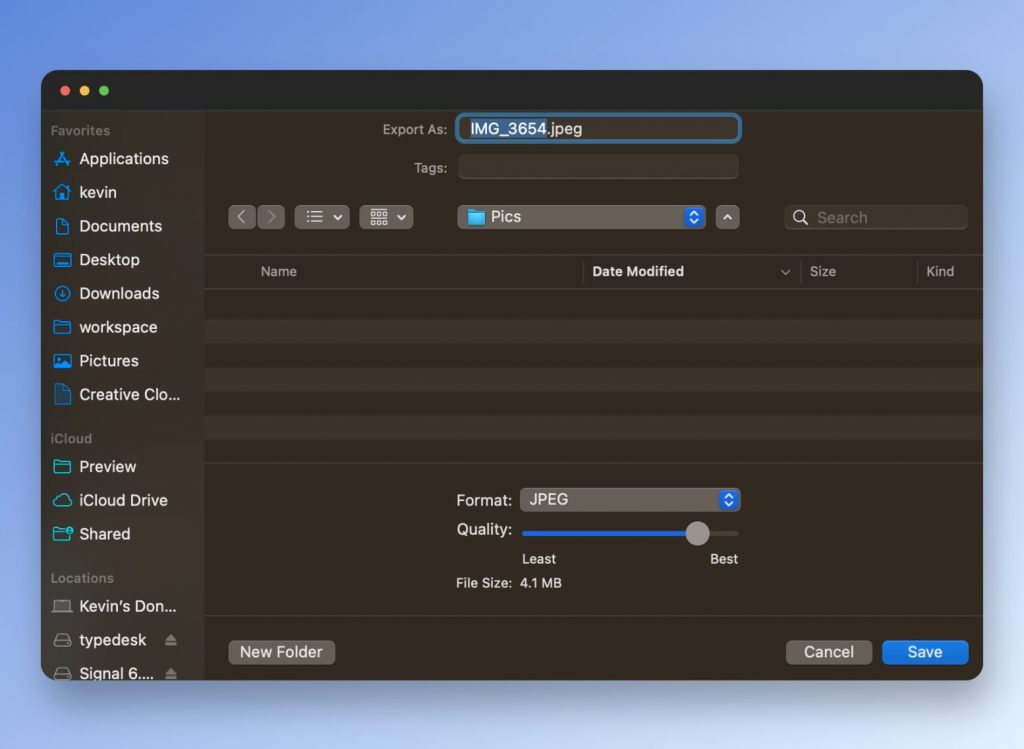
Method 1: Converting HEIC to JPG using Mac Preview:
Mac Preview provides a built-in feature to convert HEIC to JPG. Simply follow these steps:
Step 1: Open the HEIC image(s) in Preview by double-clicking on the file.
Step 2: Click on “File” in the menu bar, then select “Export.”
Step 3: Choose “JPEG” from the format options and adjust other settings if needed.
Step 4: Select the destination folder and click “Save” to convert the HEIC file to JPG.
Method 2: Using Online HEIC to JPG Converters:
Several online tools allow you to convert HEIC to JPG conveniently and without the need for any additional software installation. Here’s a simple process you can follow:
Step 1: Open a web browser and search for “HEIC to JPG converter.”
Step 2: Choose a reliable online converter from the search results. For example https://www.freeconvert.com/heic-to-jpg
Step 3: Upload your HEIC file to the converter.
Step 4: Select “JPG” as the output format.
Step 5: Click on the “Convert” or “Start Conversion” button.
Once the conversion is complete, download the converted JPG file to your computer.
Method 3: Using Dedicated Conversion Software:
If you frequently work with HEIC files and require advanced conversion options, dedicated software can be a viable solution. Some popular software options include:
- iMazing HEIC Converter: This free software is available for both macOS and Windows. It allows batch conversion of HEIC files to JPG and offers customization options for output quality.
- Apowersoft HEIC Converter: Available for Windows users, this software supports converting HEIC files to various formats, including JPG. It also offers options for resizing and renaming images during the conversion process.
Conclusion:
Converting HEIC to JPG provides numerous benefits, including wider compatibility with websites and applications, reduced file size, and enhanced editing capabilities. In this article, we discussed different use cases for converting HEIC to JPG and outlined three effective methods to accomplish this task. The macOS Preview option offers a convenient solution for macOS users, while online converters provide a platform-independent approach. Additionally, dedicated software like iMazing HEIC Converter and Apowersoft.